
GPG with GitHub on OS X
📖 Note: This post is from the archives. It may reflect outdated information.
There’s been a lot of chatter about GitHub’s recent announcement in regards to their support for signing tags and commits. For those who don’t know, Git allows anyone to commit as anyone, but that opens up room for impersonation on platforms like GitHub where a community exists. GPG-signed commits or “verified signatures” provide reassurance to others that commits from Willow Bxmxy are actually originating from her computer instead of someone who is impersonating her.
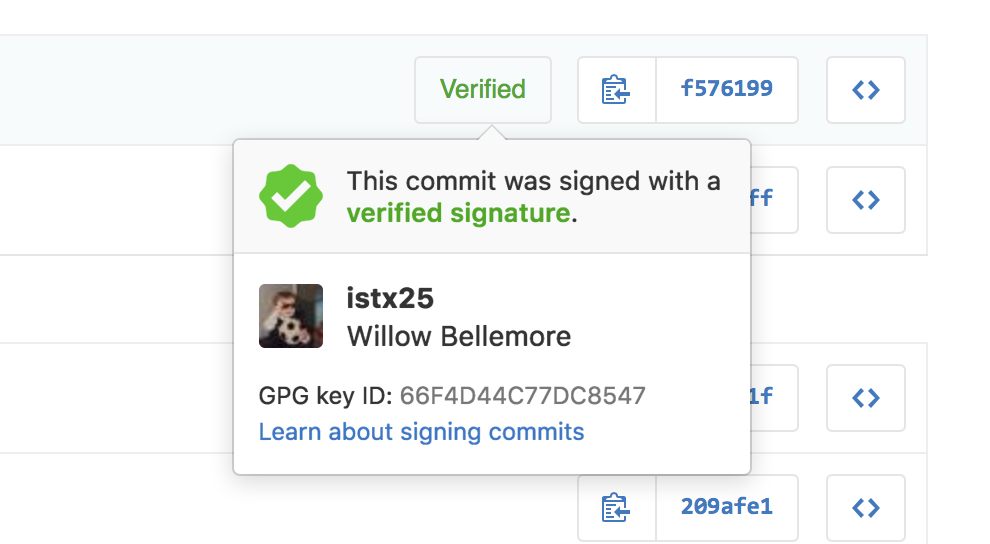
I spent hours reading through the documentation and random posts to gather a better understanding about GPG. Git supported GPG-signed commits before GitHub released their support for the feature. So I was delighted to find lots of coverage on Stack Overflow and in the Git SCM book. I am writing this post to hopefully bring a humanised approach to configuring this feature with GitHub on an OS X-based machine.
Step One: Install and configure the toolbox
There is a bunch of dependencies that we’ll need to install. I recommend doing so with HomeBrew. The two dependencies we need are:
GnuPG
GnuPG, also known as GPG, is a command line tool which is used to encrypt and sign data with a public and private key.
Pinentry
Pinentry is a small collection of dialog programs that allow GnuPG to read passphrases and PIN numbers in a secure manner.
Install these dependencies by running the following command:
$ brew install gnupg21 pinentry-mac
Now that we have installed the tools we need on your machine, we will need to configure gpg-agent so it knows to use Pinentry when collecting passphrases.
To make that change, open up ~/.gnupg/gpg-agent.conf in your editor of choice and paste the following:
pinentry-program /usr/local/bin/pinentry-mac
This is where OS X’s special ingredient comes in. Pinentry for Mac is awesome because it connects gpg-agent to the Login Keychain on OS X. Storing the passphrase in the keychain is safe, secure and accessible.
This allows for (optional) automatic key signing and helps avoid the unnecessary frustration and hair loss of always having to provide your passphrase when committing changes.
Step Two: Generate a key
Now let’s generate a new GPG key using the default parameters, but feel free to customise the parameters.
This key will be used to sign your commits and let GitHub know so your verified signature badge is visible to others to see.
$ gpg --gen-key
Key Type
Select what kind of key we want to create. In this situation, you will want to create a default RSA and RSA key.
Please select what kind of key you want:
(1) RSA and RSA (default)
(2) DSA and Elgamal
(3) DSA (sign only)
(4) RSA (sign only)
Your selection? ↵
RSA is the most common Public Key Cryptography algorithm. These algorithms allow us to “sign” messages by encrypting them with a public key. This is effective since any recipient (GitHub) of the message (a commit) can verify that the user’s public key can decrypt the message and thus prove that the user’s secret key was used to encrypt it.
If the user’s secret key is, in fact, secret, then it follows that the user and not some impostor really sent the message.
Key Size
The key size determines the length and amount of time needed to process operations. The larger the size, the longer it takes.
Let’s use the default key size of 2048.
RSA keys may be between 1024 and 4096 bits long.
What keysize do you want? (2048) ↵
Key Expiration
Depending on what the key is being used for, it can be a good idea to specify an expiry date to add that extra level of security. However, because this key is being used to sign commits, I would personally avoid specifying an expiry date or maybe have it expire every 5 years.
Please specify how long the key should be valid.
     0 = key does not expire
  <n>  = key expires in n days
  <n>w = key expires in n weeks
  <n>m = key expires in n months
  <n>y = key expires in n years
Key is valid for? (0) ↵
Key Identity
Create a user ID to identify your key. This identity is constructed using a real name, comment and email address in this form:
Willow Bxmxy (iOS Engineer) willow.rose@bxmxy.ca
Provide the requested information using the prompts and enter an O at the end to confirm your details and continue.
Key Passphrase
You need a passphrase to protect your secret key. I would recommend using a tool like 1Password to generate this phrase.
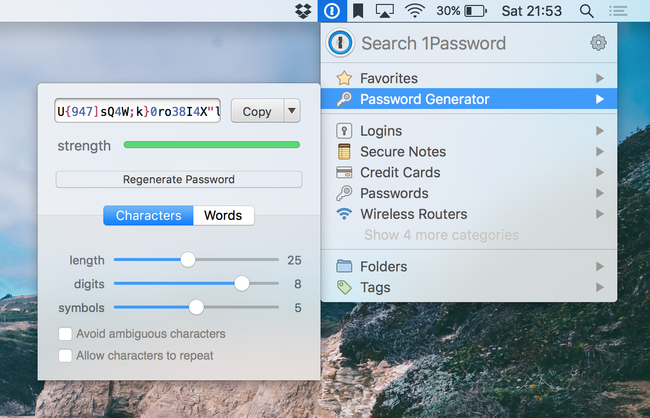
Passphrase suggestions:
-
Between 15 and 25 characters long.
-
Include numbers and symbols.
-
Avoid repeating characters.
-
Allow ambiguous characters.
Reminder: Save this passphrase. You will need to provide it again in the future (even if you intend on saving it in the keychain). I personally have mine stored in 1Password, so I don’t lose it.
Step Three: Configure Git + GitHub
Next we’ll configure Git with your key and loop GitHub in on the magic. List out all of your keys and find the one you want to use.
$ gpg2 --list-keys
/Users/willow/.gnupg/pubring.gpg
--------------------------------

pub   rsa2048/797FCB96 2016-04-17 [SC]
uid         [ultimate] Willow Bxmxy (iOS Engineer) <willow.rose@bxmxy.ca>
sub   rsa2048/C1684200 2016-04-17 [E]
pub   rsa2048/0A46826A 2016-04-17 [SC]
uid         [ultimate] Willow Bxmxy (Alternative) <willow.rose@bxmxy.ca>
sub   rsa2048/874529A9 2016-04-17 [E]

You will need to provide your own signing key. If I wanted to use the key commented with: “iOS Engineer,” I would copy down 797FCB96.
Set your global signing key and tell Git that you’re using gpg2:
$ git config --global user.signingkey 797FCB96
$ git config --global gpg.program gpg2
Export the key
Now export your GPG key to add it to your GitHub account:
$ gpg --armor --export 797FCB96
lt;p>Copy your GPG key, beginning with the “Begin PGP Public Key Block” comment and ending with the “End PGP Public Key Block” comment.
Add the key to your GitHub account
In the top right corner of any page (on https://github.com), click your profile photo, then click “Settings.”
In the user settings sidebar, click “SSH and GPG keys.”
Click “New GPG key.”
In the “Key” field, paste the GPG key you copied while exporting.
Click “Add GPG key.”
To confirm the action, enter your GitHub password.
Step Four: Sign all of your commits (Optional)
I sign all of my commits because I love the simplicity of not having to provide my passphrase every time. There is some controversy regarding this, but I do not see any of the common concerns to be an issue.
To sign all of your commits by default, add this to your .gitconfig file:
[commit]
gpgsign = true
Sign a commit and check the “Save in Keychain” box in Pinentry to avoid providing your passphrase in the future.
Step Five: Take ‘er out for a spin!
Here’s a little sample for testing it out and signing a commit.
$ git clone https://github.com/istx25/some-project
$ cd some-project/
$ echo “Follow @istx25 on Twitter!” >> README.md
$ git add -A
$ git commit -s -m “Initial (signed) commit”
$ git push
Thank you for reading. Please feel free to reach out on Twitter or via email if you have any questions or find anything that could be improved or needs correcting. Happy to help (and learn)! ❤
That’s all folks.